Your Complete Guide to Capturing Amazing Star Trails
Thanks for taking the time to check out this page. I’m naming this article “How to Photograph Star Trails”, but more accurately it should be called “How I Photograph Star Trails.” I’m sure there are plenty of people who do things differently than me. If you have any feedback, suggestions, questions, or comments about anything on this page, please feel free to contact me, or leave a comment at the bottom of the page. I certainly encourage discussion of the topic.
Why Photograph Star Trails?
I first became interested in photographing star trails when we moved to a home outside the city lines, and far from the city light. I noticed standing in our backyard that I could see so many more stars than when we were living in the city. As a photographer, I thought how awesome it might be to see how these stars move over a long period of time in ONE photograph. I had seen some star trails shots before, but had never attempted one.
My first few tries were disasters, but each time I learned something and added a small piece to the puzzle. It wasn’t long before I was finally at the point where I was making images that I was satisfied with. Hopefully by sharing my experience here with you, it will give you a leg up and help you avoid some of the mistakes that I made.
How do we do it?
As a quick overview before we get started, I want to describe in a nutshell the method I’ll be explaining in this tutorial. For me, I’ve found that the best way to photograph star trails with a digital camera is to shoot multiple exposures and combine them later with software. This tutorial will cover planning, setup, and composition, determining exposure values, and finally post-processing.
In addition, I want to point out that I am going to assume that you know the basic relationship between ISO, Shutter speed, and Aperture. I will try and explain it a bit, but it is really a whole lesson in itself. If you are unclear on this, I highly recommend the book Understanding Exposure by Bryan Peterson. For me, it has been the hands-down most important item I’ve ever purchased for my photography.
Let’s get started!
Things you will definitely need
- A Digital SLR or Mirrorless Camera
- A Tripod
- A wired shutter release with a mechanism to lock the shutter button down
- A clear, dry night
- Time
Things you might need

- Something to keep your lens from fogging up if it’s cold outside. I like to use those hand warmer things that you use when you are skiing. I just use some Gaffers tape to wrap them around the lens. They do a fantastic job.
- The moon in the New Moon phase. (This is desirable, but sometimes not absolutely necessary)
- A Battery Grip. With a battery grip, you can shoot with two batteries. With two batteries you can shoot twice the amount of photos before you run out of power.
Setup
1. Check the weather to be sure you are going to have a dry and clear evening. Here in Florida, those nights don’t come very often in the spring and summer, but all the time in the late fall and winter. I’m sure out west they happen all the time.
2. If you are shooting in your backyard, or any other property that is artificially irrigated, **make sure the sprinklers are NOT set to run** Unfortunately, I learned this lesson the hard way.
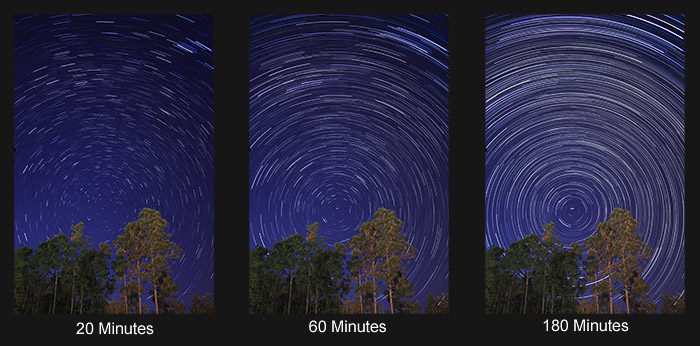
3. Determine how long you want your exposure to be. Obviously, if you want longer trails you will need to extend the amount of time you make exposures of the stars. Check out the photo below to see star trail lengths over 3 different intervals. For even more, click on my gallery, 9 Star Trail Exposure Time Examples.
Since I’ve done most of my star trail photography in my backyard, I’ve been able to set the camera up and go inside to watch TV. Normally I just head inside and fall asleep on the couch. Then I go pick up the camera after I wake up in the middle of the night. If you plan to employ this strategy, I want to strongly reiterate the importance of Steps 1 and 2. I would hate to get an email from someone blaming me for letting it rain on your camera! 🙂
4. Put your camera on your tripod, and attach your wired shutter release. Bring it to a place outside where you would like to photograph the stars.
Composing the Image
Focal Length
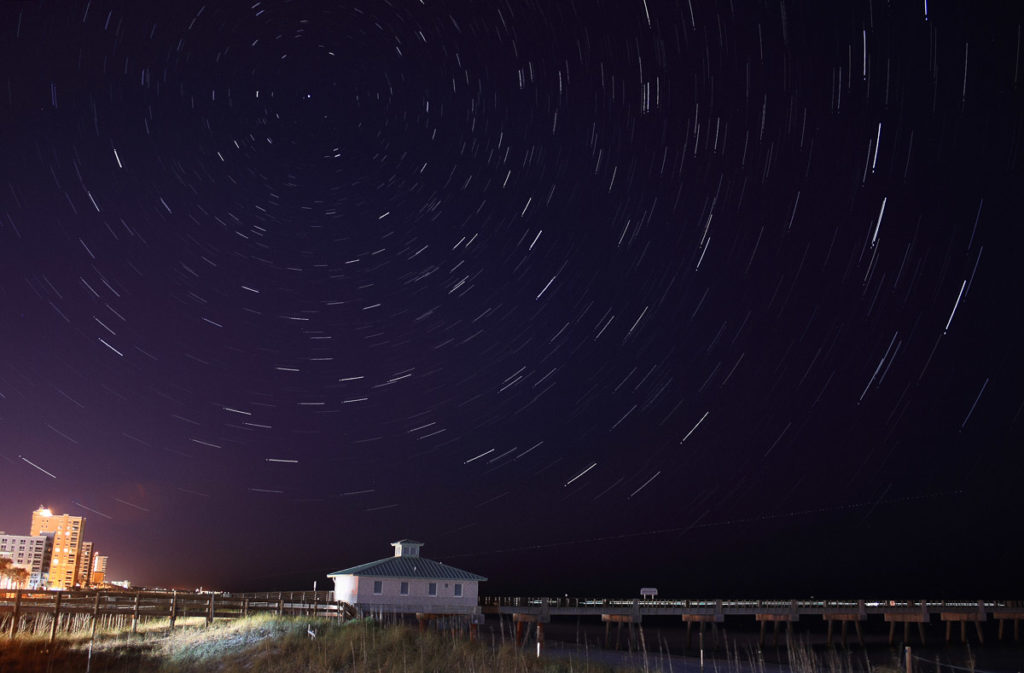
The kit lens that comes with most consumer-level DSLRs generally has a focal length range of around 18mm to 55mm. I’ve found that I prefer the wider the focal length the better. So if you are using the kit lens, first try it at 18mm, then experiment at other focal lengths. I shot most of my star trails images at 18mm – UNTIL I discovered ultra-wide lenses. A while back I purchased a 10-20mm lens by Sigma, and it really gave the images a whole new dimension. I love the 10mm focal length so much that I also purchased the Canon 10-22mm lens, and kept the Sigma as a backup. Since then, Canon has released a more “affordable” ultra-wide with a focal length of 10-18mm.
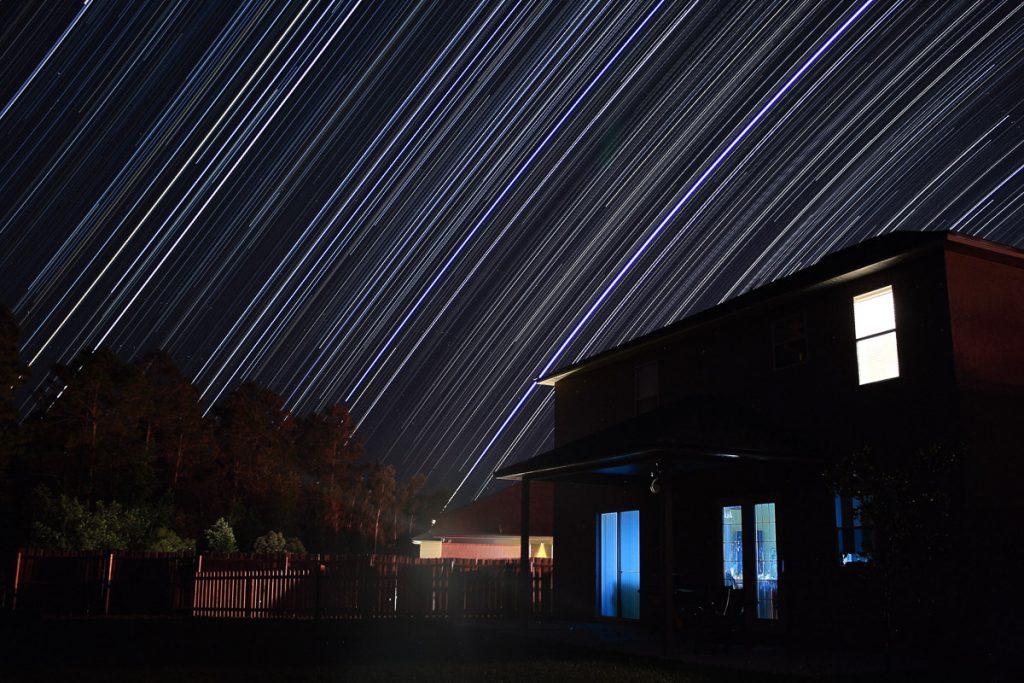
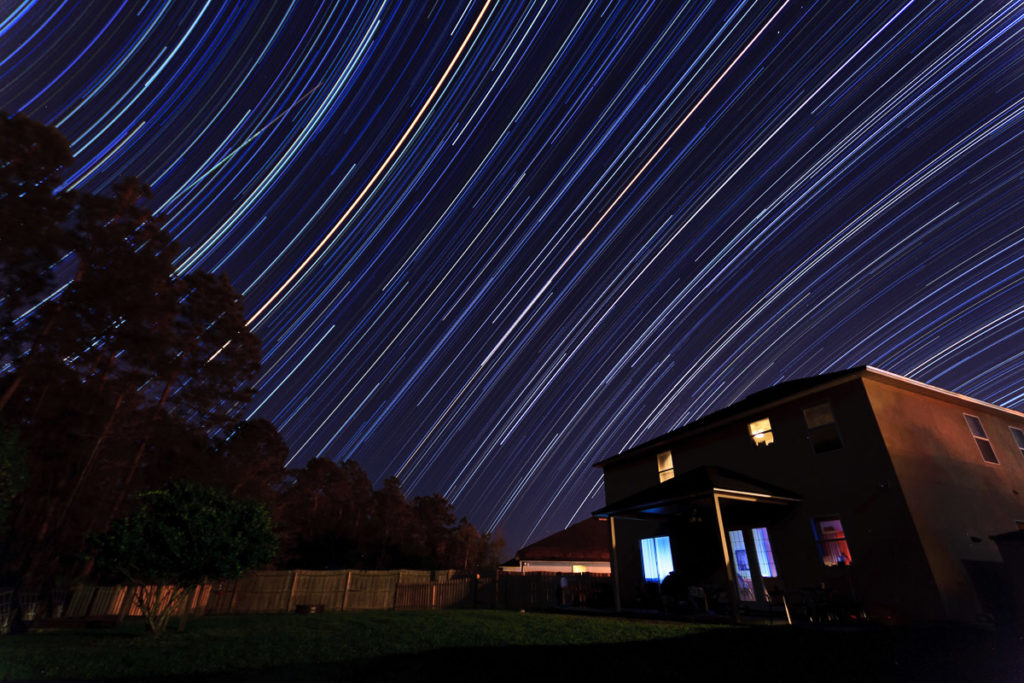
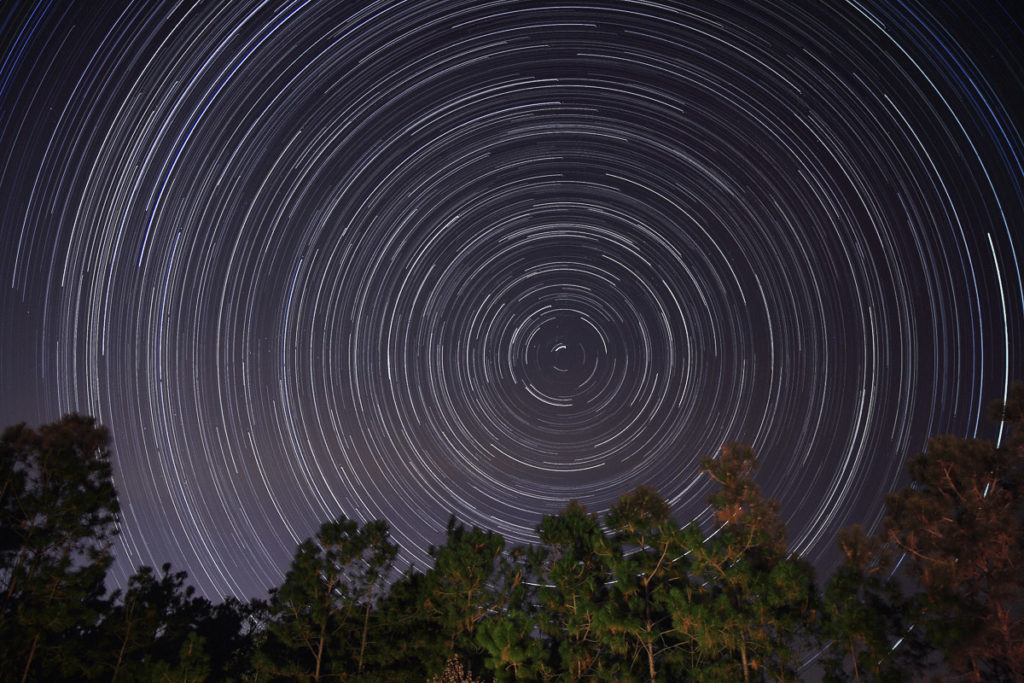
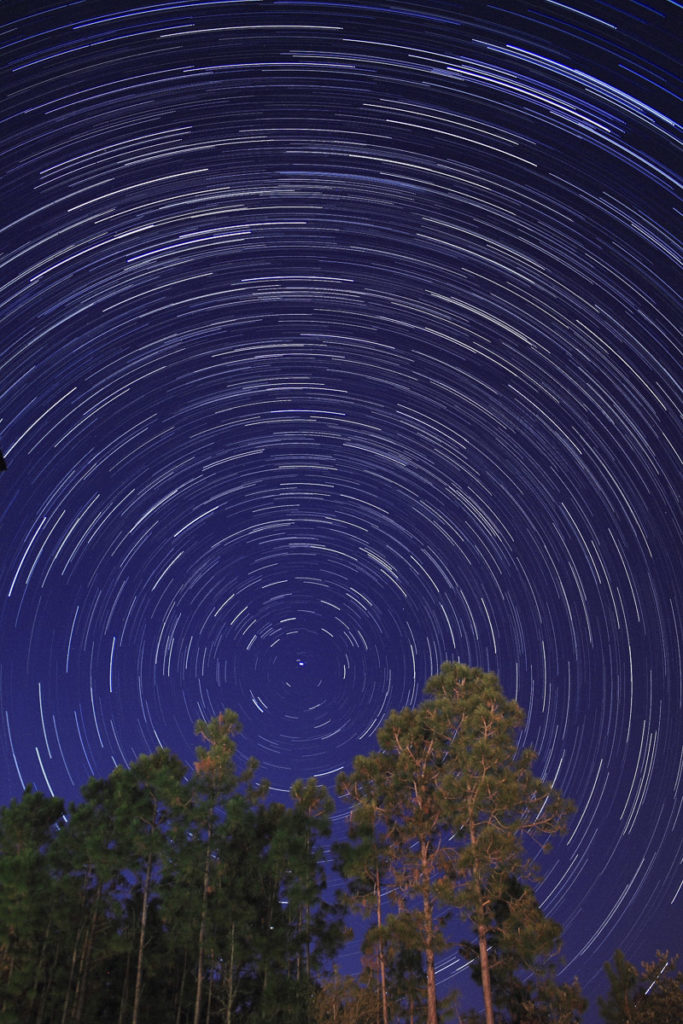
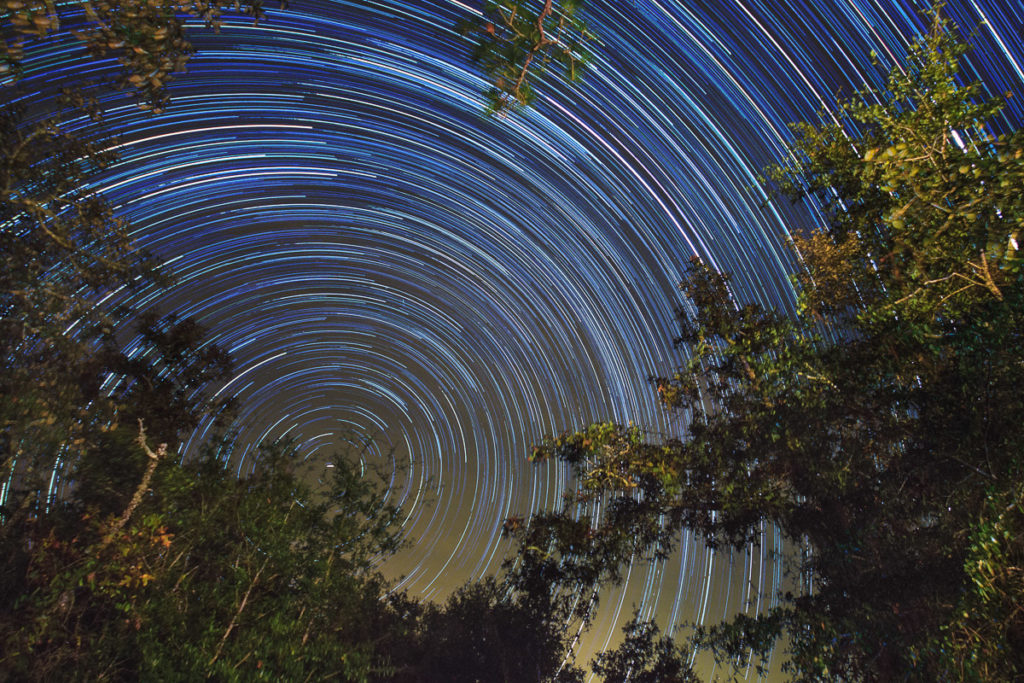
Check out the image above, I shot it at 18mm. Compare it to the image at the top of this page, which I shot from the same place at 10mm. Can you see the difference? Whenever I shoot star trails now, I use one of my ultra wides, and at 10mm. In fact, I use the Canon 10-22mm in all kinds of situations – it might just be the most used lens in my collection. The ultra wides give a look to photos that you just cannot get with a “normal” zoom, and I highly recommend picking one up.
Focus
Once you have your focal length, the next thing to do is establish focus. Point the camera at a bright star or anything that is far away but bright, and half-press the shutter until it locks focus. Once you are satisfied with the focus, carefully turn off the auto-focus feature. You will usually find the auto-focus switch on your lens. Once you’ve done this, you won’t have to worry about focus anymore. Just be careful not to change the focus by accidentally moving the focus ring or zoom ring on your lens. Also, when you are finished shooting your star trails, don’t forget to switch the lens back to auto-focus.
Compose
Once you have set up your tripod and established your focus point, you will need to compose your image. Obviously, the stars are the main ingredient for this project, but I’ve found that it’s always desirable to have something from Earth in the foreground of the photo to give perspective to the star trails.
If you are interested in capturing the “circle” around the North Star, then you will need to know how to find it. This site has a good explanation on how to find the North Star. As you can see from several of my photos, our backyard faces the north. I’ve always loved the swirl effect that results from having the north star in the frame. However, surprisingly my most popular star trails photo has been the one facing east, with my house as the foreground. See the photo at the top of this page. The only explanation I can think of for this is that it not only adds perspective but also “life” to the photo. That may be something worth considering when composing your photograph as well.
The Moon
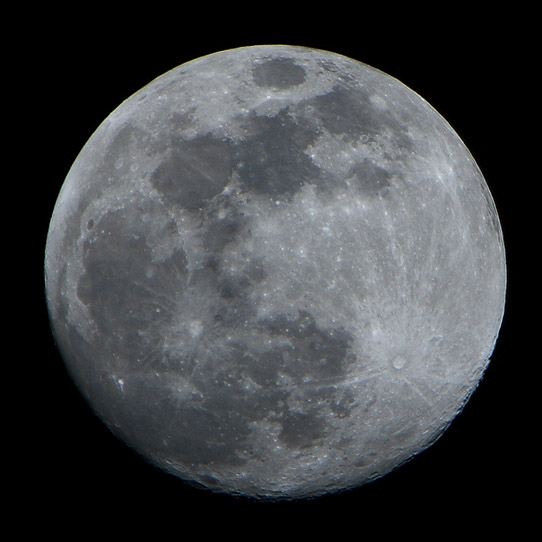
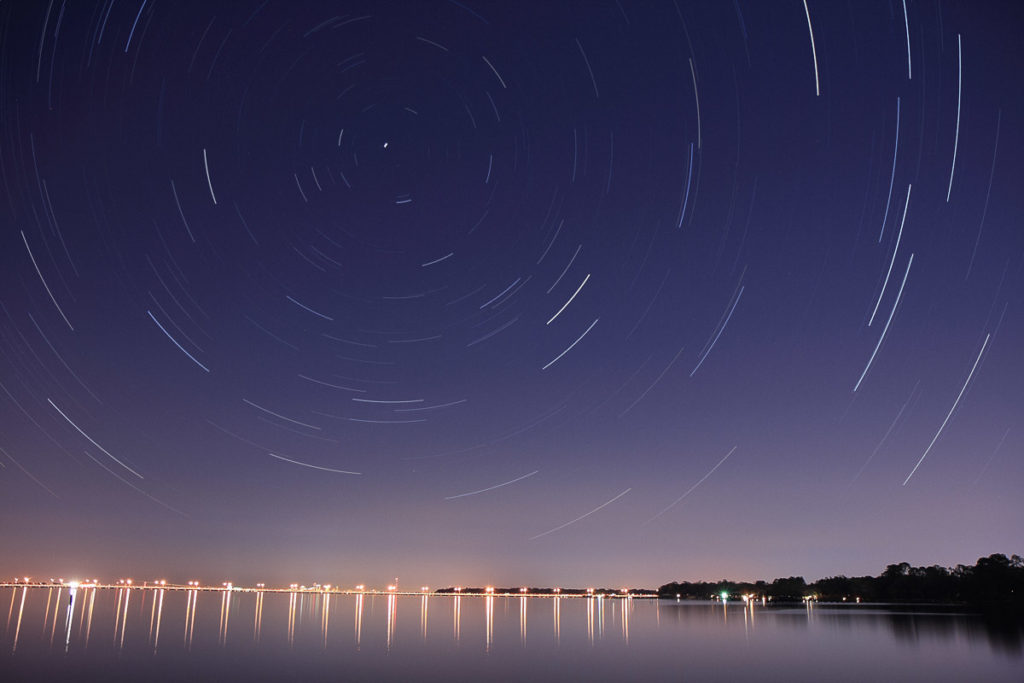
If the moon is in the sky, make sure it is not in the frame. Also, make sure it’s not going to move into the frame during the course of the shot! Obviously the moon adds light pollution to the sky, but as long as it’s out of the frame you can still record the star trails successfully. Make sure it is as far out of the frame as possible. Just remember that any light that is in the area (the moon, streetlights, city lights) will decrease the number of stars that you will see in your photo, so you will want to try your best to keep it to a minimum. You can see this by comparing my backyard shots to any that I’ve done elsewhere, where there is more light.
Here is an example of how light pollution can affect a photo of star trails. The first photo shows one hour’s worth of exposures in my backyard. The next is one hour’s worth of exposures over the St. Johns River, facing toward downtown Jacksonville:
Determining Your Exposure Value
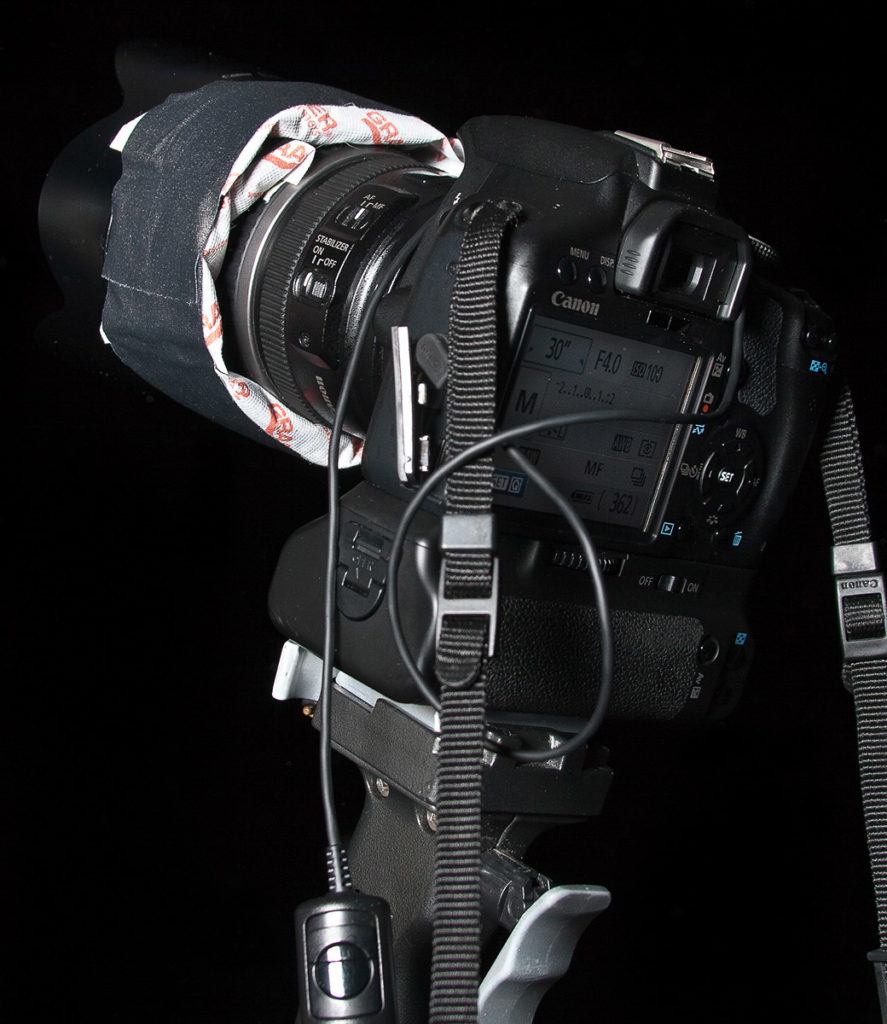
Before I explain how to determine your exposure, I want to explain briefly how I make these images. In the “things you need” section, I wrote that you need a Wired Shutter Release with a mechanism to lock the shutter button down. Have you ever used the Sports setting on your DSLR? Or put the camera in burst mode? You hold the shutter button down and the camera continues firing off photos until you lift your finger. This is precisely what you will be doing here, except on a longer, larger scale. Each shot will be a 30-second exposure. Later I will describe how to use software to combine these photos into a single image.
Here is what you will be trying to achieve for each of these settings:
Aperture
Quick story: The first time I tried shooting star trails with my DSLR, I figured I could do it with one super long exposure. So I set up the camera and tripod in the backyard, fired off a few test shots. I found a composition where a good exposure would be 1 minute at f4 and ISO 200. Using the knowledge that I gained from the Understanding Exposure book, I calculated that I could get the same exposure by increasing it to 64 minutes, but changing to f/22 and ISO 100. I changed the settings, started the exposure with my wired shutter release, and went inside to watch TV. 64 minutes later I came back outside and stopped the exposure. When I viewed the photo on the computer, I learned two very important lessons:
Lesson 1
The photo was very noisy and there were TONS of random colored dots all over the photo (I later learned these were called hot pixels). If you leave the shutter open too long on a digital camera, you will get more noise and hot pixels, which result from the digital sensor working overtime collecting all of the information in your photo. Remember that, unlike a film camera, your sensor is a piece of electronics that can (and will) heat up if you leave it running too long. This is why for me the best way to photograph star trails with a digital camera is to shoot multiple exposures and combine them later on the computer. I have yet to determine what the longest acceptable exposure is, but if I ever experiment with that, I will definitely let you know. Most likely, each camera will have a different threshold, and each person will have a different opinion on what is acceptable.
Lesson 2
The second issue that I noticed was that the star trails were VERY faint, almost to the point that you could not even see them. The lesson I learned here is that your aperture (aka f-stop) needs to be as close to “wide open” as possible. Which means you want your f/stop to be the lowest number possible. (f/2.8, f/4, f/5.6…). I do not recommend going any smaller than f/5.6. I’m sure the photo will be fine, but for each stop down of aperture, the less amount of stars and light intensity you are going to capture. Think of it this way: at the beginning of a 30-second exposure, a star will have an entirely different footprint in your frame than at the end of the exposure. Since it is moving so quickly, you want to be able to capture as much light as possible at each position that it is in (wider aperture = more light into the sensor at any given moment).
If you find that an aperture of f/5.6 is still causing your foreground to be overexposed, then I would suggest finding a different place to shoot from. Conversely, if your aperture is as wide open as possible, and your foreground is still underexposed, I recommend bumping up your ISO, but not too high (see “ISO” below for more details).
Shutter Speed
For this method, the shutter speed needs to be exactly 30 seconds. The only reason for this is because 30 seconds is the longest shutter speed that I can set my camera to before switching to “bulb”. If your camera goes higher, then you can go higher. And trust me it would be nice to do longer exposures, so you can have fewer photos to work with. I just haven’t put the time into exploring other options as of yet. Again, remember that there will be a noise threshold for longer shutter speeds. Some things that might be worth exploring are intervalometers if there are any available for your camera or tethering to a computer.
I’ve tried intervalometers with so-so luck but haven’t been able to perfect it yet. With my cameras and the intervalometers that I’ve used, the shortest interval between shots I’m able to get is 3 seconds, which to me is way too long, especially when facing the east or west when stars “move” the fastest. If I become more successful with this method or any other method I discover, I’ll be sure to update this section.
ISO
I like to use the lowest ISO necessary to achieve the exposure I need. A general rule of thumb that I like to use is if your camera was manufactured in 2009 or after, start at ISO 200 and experiment up from there, but try to cap it at 800. If you have an older camera, start at ISO 100 and go from there, but try not to go beyond 400. The reason for this is you want as little noise as possible in your photos. Noise is increased as the shutter speed increases, and also as the ISO increases. Since you’re shooting 30-second exposures, why not strive to have the lowest ISO possible to achieve the look you want?
Test Photos
It’s a good idea to take a few test shots and tweak the settings until the image you see on the LCD (the foreground as well as the stars) is exposed the way you are looking for. The first thing you will need to do is put your camera into “Manual” mode. This is normally the “M” on the dial at the top of your camera. The three settings that you will be concerned with when determining your exposure will be ISO, Shutter speed, and Aperture. As I said above, these all relate to each other. When one of these is adjusted, another one might need to be adjusted to compensate.
A Tip For Taking Test Photos: Taking test shots at 30 seconds each can take a lot of time. One trick that I use is changing my shutter speed to 4 seconds, so I can take more test shots in a short period of time. That is *3 stops* faster than 30 seconds, so I will need to compensate for those 3 stops by bumping my ISO up by 3 stops (e.g. from 100 to 800). Otherwise each test shot will take 30 seconds! Once I have the exposure where I want it, I change the shutter speed back to 30 seconds, and the ISO back down 3 stops, and take one last exposure at 30 seconds. If it looks good, then I know I’m ready to begin.
Execution
OK, now you have composed your image, and determined your exposure values. This is the easy part. Press the button on your shutter release, lock it down, and watch the camera do its work. If you are at home this is easy because you can go inside and get a snack, watch TV, take a nap, or whatever. If you are not, make sure you have something to occupy yourself with in order to pass the time. Also if you are in a public place, make sure you are set up in a place where nobody else will accidentally disturb your setup. One wrecked exposure in the middle of 250 exposures will greatly decrease the number of photos you can use in your final product.
Processing
JPG vs. RAW
While it’s not absolutely necessary to shoot in RAW, I highly recommend it for one main reason: white balance. I’ve found that when I point the camera to the sky at night, it never registers the white balance the way I ultimately like it. Each shot is different with many factors playing into the colors in the night sky. For my taste, it would take too long to test white balance ranges in camera when I can do it one time on the computer with software, after the photos are finished. It’s nice knowing that I can test the entire range of white balance after the fact, and create the colors that are most appealing to me for each individual shot.
Converting to JPG
If you are shooting JPG, you can skip this step; otherwise read on. Once I have the RAW files on the computer, I open them in Adobe Lightroom and choose one of the early photos to edit. I’ll do the normal exposure adjustments, and adjust sharpness up. Then I’ll use the white balance slider back and forth until I find the exact color that most appeals to me. I don’t go so extreme that the colors are completely unrealistic, but I do give myself some creative license. Once I have the photo the way I like it, I copy the recipe and paste or sync it to the rest of the photos in the set.
Airplanes
If you are shooting anywhere near civilization, you will most likely have some shots with airplane trails in them. I like to use the clone tool in Photoshop to remove the airplanes. If it was a busy night, this could take a while, but your final product will look much better if you take the time to remove them. If there are a lot of airplanes on any particular night, sometimes I’ll go ahead and render the star trails photo, and then decide which airplane trails are most offensive and just remove those.
It’s always best to go back to the original photos to remove the airplane trails, and then re-render the star trails photo. I have, however, discovered that if I decide to make a time-lapse video of the photographs, then I like to leave the airplanes in for them. I think they have a very cool “shooting star” effect. Again, just my taste; you may think differently.

Software
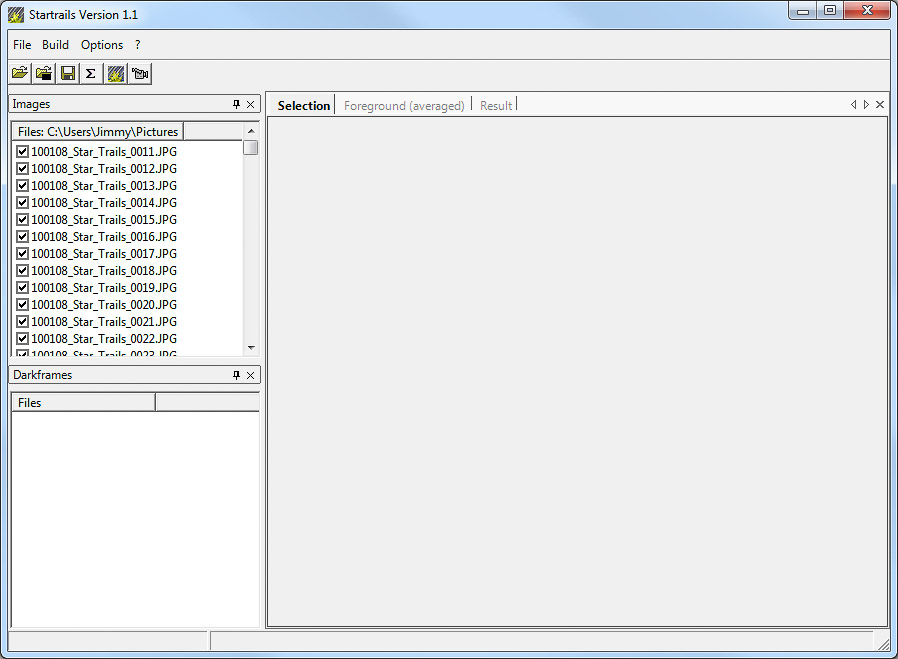
Most of my star trails shots I’ve rendered using an app called startrails.exe. It was created for the sole purpose of combining images for star trails. I’m sure there are other good apps out there. If anyone has any other good ones they recommend, let me know and I’ll give it a try.
Startrails.exe will also build a time-lapse video of your photos, which I have not tried that feature yet with this software.
To start, just click “File >> Open Images” and choose your images. Then choose “Build >> Startrails”, and it will begin combining all of your images.
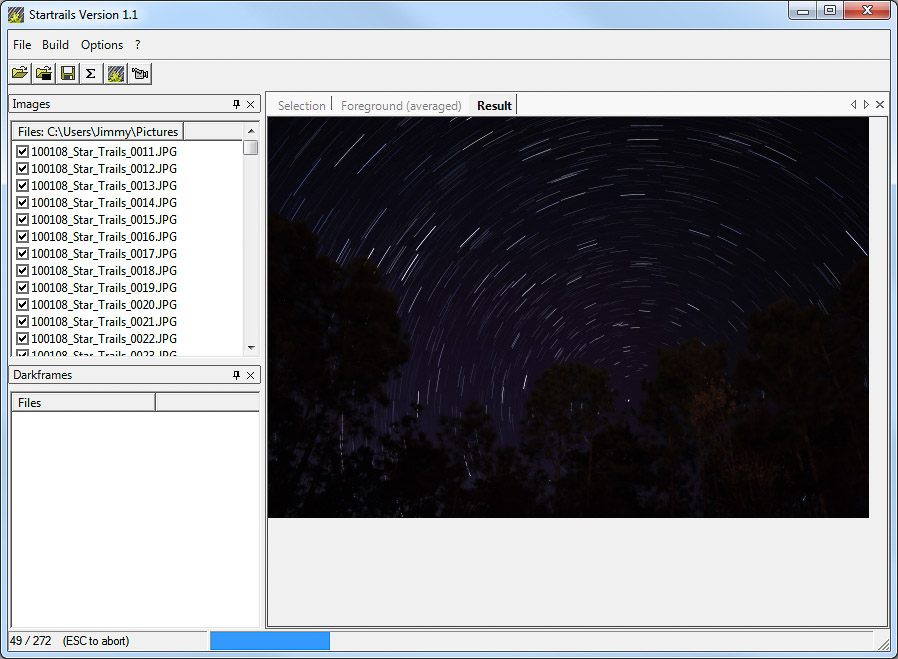
Here is what it looks like when it is processing. Notice that it will continually show you the photo as it is being rendered. That’s a neat feature.
Sharing
There you have it! … I hope you found this guide useful. As I had said above, I encourage feedback so that I can improve, and please feel free to email me or comment below with any other questions or comments. Enjoy shooting your star trails, and please send me a copy of your photo if you try. If I get enough, I’ll create a gallery with others’ names and photos and link to it from here.
And remember the most important lesson of all in photography: Have Fun! You are going to make mistakes. Don’t worry, everyone does; just remember that each mistake you make leads you to becoming a better photographer!
Happy Shooting!
Further Reading
If you landed on this page because you are interested in long exposure photography, you may also be interested in our latest tutorial, How to Photograph Fireworks. Check it out and let me know what you think!
James is a part-time photographer in Ponte Vedra, Florida, and creator of jamesvernacotola.com. He does freelance work for corporate clients and for Jacksonville.com, but his favorite gig is covering his kids’ sporting events as a parent with a camera.
great!! thanks for the useful tips. keep it up.